这是一个随手的笔记,主要是为了方便日后再次遇到时容易找到方法。本人使用了一台联想拯救者R720,一个nvme m.2接口的SM961 128G作为系统盘,同时还有一个1TB的机械盘。由于Windows10 经常频繁的自动更新,而且越来越慢,实在受不了,最后决定把系统改成Linux的。
因为这已经不是第一次的冲动了,这笔记本在入手没多久后就已经有想法了,无耐当时在nvme m.2这个硬盘无法识别,还有后续的N次(独显问题,WIFI问题,蓝牙问题,触摸屏问题)等。在多次失败后,最后在今年5月份左右,安装上了Ubuntu 20.04 LTS。
以下记录是在安装完这系统中的一些基本操作,及个人安装的一些软件,主要是解决了满足我的一个日常工作,生活等要求。其实Linux现在已经可以说满足大部分人正常的工作需要,特别是搞IT,程序员等。在编程开发这块可以说是很棒的,简单的来说在Windows10下跑个go程序要卡一下,但是在ubuntu下就刷一下就完了。
但是它也在不足的地方就是很多软件都可能没有Linux下的版本(比如微信),所以很多人不愿意使用,再说就是要有些技术基础,和学习成本。
安装过程很简单,基本下一步就完事了。这次的版本解决了我之前遇到的问题,基本满足了我的需求。这是在使用了三个多月后的一个使用感受,但是文中记录的只是在平时使用过程中遇到的一些点点滴滴。
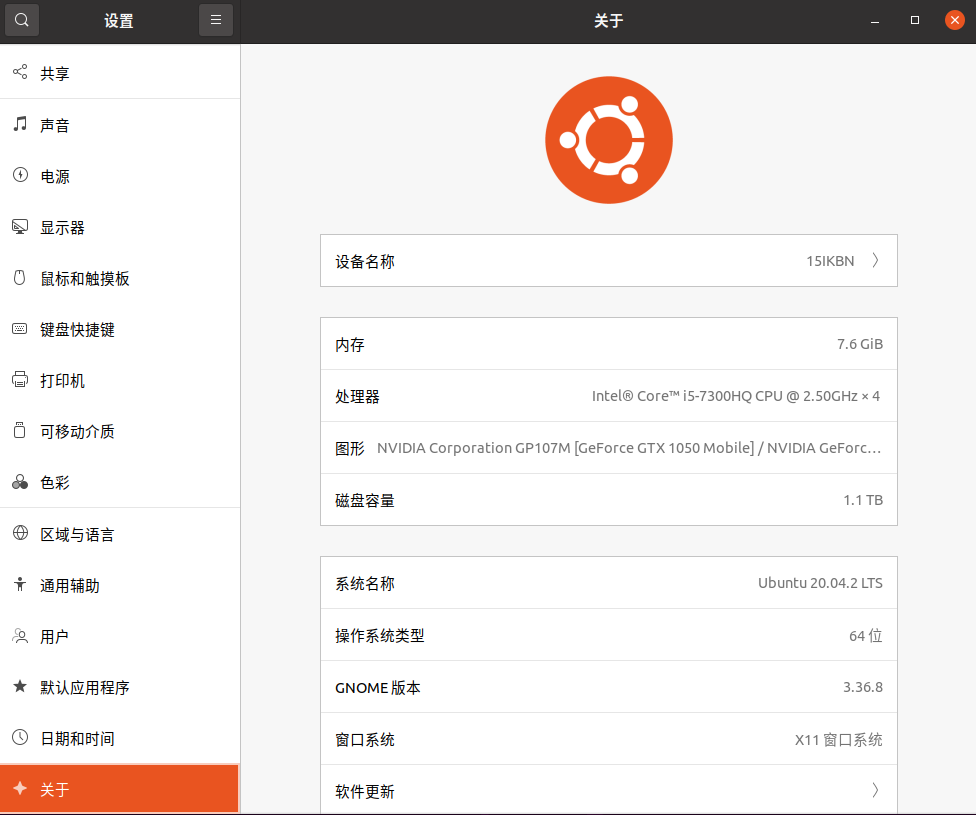
笔记本配置
CPU: Intel 酷睿i5 7300HQ 四核心/四线程
主板芯片: Intel HM175
内存: 8G
机械硬盘: 1TB
固态: NVMe 128GB 三星
查看硬件信息(驱动正常都能看到)
swper@15IKBN:~/Desktop$ lspci
00:00.0 Host bridge: Intel Corporation Xeon E3-1200 v6/7th Gen Core Processor Host Bridge/DRAM Registers (rev 05)
00:01.0 PCI bridge: Intel Corporation Xeon E3-1200 v5/E3-1500 v5/6th Gen Core Processor PCIe Controller (x16) (rev 05)
00:02.0 VGA compatible controller: Intel Corporation HD Graphics 630 (rev 04)
00:14.0 USB controller: Intel Corporation 100 Series/C230 Series Chipset Family USB 3.0 xHCI Controller (rev 31)
00:14.2 Signal processing controller: Intel Corporation 100 Series/C230 Series Chipset Family Thermal Subsystem (rev 31)
00:16.0 Communication controller: Intel Corporation 100 Series/C230 Series Chipset Family MEI Controller #1 (rev 31)
00:17.0 SATA controller: Intel Corporation HM170/QM170 Chipset SATA Controller [AHCI Mode] (rev 31)
00:1c.0 PCI bridge: Intel Corporation 100 Series/C230 Series Chipset Family PCI Express Root Port #2 (rev f1)
00:1c.2 PCI bridge: Intel Corporation 100 Series/C230 Series Chipset Family PCI Express Root Port #3 (rev f1)
00:1c.3 PCI bridge: Intel Corporation 100 Series/C230 Series Chipset Family PCI Express Root Port #4 (rev f1)
00:1d.0 PCI bridge: Intel Corporation 100 Series/C230 Series Chipset Family PCI Express Root Port #9 (rev f1)
00:1f.0 ISA bridge: Intel Corporation HM175 Chipset LPC/eSPI Controller (rev 31)
00:1f.2 Memory controller: Intel Corporation 100 Series/C230 Series Chipset Family Power Management Controller (rev 31)
00:1f.3 Audio device: Intel Corporation CM238 HD Audio Controller (rev 31)
00:1f.4 SMBus: Intel Corporation 100 Series/C230 Series Chipset Family SMBus (rev 31)
01:00.0 3D controller: NVIDIA Corporation GP107M [GeForce GTX 1050 Mobile] (rev a1)
02:00.0 SD Host controller: O2 Micro, Inc. SD/MMC Card Reader Controller (rev 01)
03:00.0 Network controller: Qualcomm Atheros QCA9377 802.11ac Wireless Network Adapter (rev 31)
04:00.0 Ethernet controller: Realtek Semiconductor Co., Ltd. RTL8111/8168/8411 PCI Express Gigabit Ethernet Controller (rev 10)
05:00.0 Non-Volatile memory controller: Samsung Electronics Co Ltd NVMe SSD Controller SM961/PM961
下载系统,并创建一个USB安装盘
https://mirror.bjtu.edu.cn/ubuntu-releases/20.04.2.0/ubuntu-20.04.2.0-desktop-amd64.iso


# 制作USB安装工具很多,随便都可以。我这里直接使用Etcher
https://www.balena.io/etcher/
安装过程很简单这里就不做详细的记录了。我是把系统安装了固态硬盘上的,硬盘直接使用LVM 格式处理
以下记录Ubuntu安装完后的一些基本操作。主要是为了更方便,满足日常的工作需要做的一些软件安装,系统配置等。
默认安装完后只有一个普通用户,所以我们要对root用户做一个密码修改
sudo passwd root #回车后输入两次密码即可完成root用户密码修改
更新软件源
在安装完成系统后先对系统做一个软件源的更新,为了下次更新或者安装软件更快。
-
备份配置文件,并把地址改成阿里云的
#备份配置文件 cp /etc/apt/sources.list{,.bak} # 修改配置文件 vim /etc/apt/sources.list # 默认可能没有vim这需要先安装一下咯,或者直接使用vi即可。 deb http://mirrors.aliyun.com/ubuntu/ focal main restricted universe multiverse deb-src http://mirrors.aliyun.com/ubuntu/ focal main restricted universe multiverse deb http://mirrors.aliyun.com/ubuntu/ focal-security main restricted universe multiverse deb-src http://mirrors.aliyun.com/ubuntu/ focal-security main restricted universe multiverse deb http://mirrors.aliyun.com/ubuntu/ focal-updates main restricted universe multiverse deb-src http://mirrors.aliyun.com/ubuntu/ focal-updates main restricted universe multiverse deb http://mirrors.aliyun.com/ubuntu/ focal-proposed main restricted universe multiverse deb-src http://mirrors.aliyun.com/ubuntu/ focal-proposed main restricted universe multiverse deb http://mirrors.aliyun.com/ubuntu/ focal-backports main restricted universe multiverse deb-src http://mirrors.aliyun.com/ubuntu/ focal-backports main restricted universe multiverse -
更新源
apt update -y
sudo
为了方便不用每次安装及对系统作一些修改时都要输入密码认证,这里对sudo授权做一个免密授权。
sudo vim /etc/sudoers
#
swper   ALL=(ALL:ALL) NOPASSWD:ALL
git简单配置
现在不管是项目代码,还是个人笔记都使用了git来做一个版本管理,方便高效管理。
#为了不用每次拉取代码都要输入帐号密码,创建一个文件,并保存以下内容
vim ~/.gitconfig

[credential]
    helper = store


#配置一下用户的帐号和密码
git config --global user.name "swper"
git config --global user.email "hz328@qq.com"
安装五笔输入法
由于个人是使用五笔输入法,所以这里只记录五笔记的安装,其它的安装方法在网上搜索一下即可以了。
sudo apt-get install fcitx-table-wubi
安装sublime
主要是这工具我一直免费使用,功能非常强大,所以必须安装。
wget -qO - https://download.sublimetext.com/sublimehq-pub.gpg | sudo apt-key add -

sudo apt-get install apt-transport-https

echo "deb https://download.sublimetext.com/ apt/stable/" | sudo tee /etc/apt/sources.list.d/sublime-text.list

sudo apt-get update
有道翻译安装(依赖一些软件包)
有些时候面对一些英文文档查看不方便时可以翻译一下。
#下载地址,找到linux对应的版本下载
http://cidian.youdao.com/multi.html

#通过dpkg 命令安装
sudo dpkg -i youdao-dict_6.0.0-ubuntu-amd64.deb

#在把下载回来的安装执行安装时会提示一堆依赖的python包,所以执行一下这命令后再重新执行安装。
sudo apt-get --fix-broken install
sudo dpkg -i youdao-dict_6.0.0-ubuntu-amd64.deb
Typora—markdown写作工具
这个工具写markdown笔记非常好用,我也是一直在使用的,主要它还有linux版的,大赞。
wget -qO - https://typora.io/linux/public-key.asc | sudo apt-key add -
sudo add-apt-repository 'deb https://typora.io/linux ./'
sudo apt-get update
sudo apt-get install typora
wine安装和卸载软件
为什么要安装这个呢?因为我喜欢玩魔兽世界冰封王座(这玩游戏暴露了年龄),因为这游戏在ubuntu通过wine可以说运行得非常顺畅。
sudo apt-get install wine -y

#如果要用wine安装一些windows下的程序可以通过以下两个命令,不过我发现安装完总有一些问题。

wine control.exe  #安装
wine uninstaller  #卸载
安装xmind
这些一款思维导图工具,虽然是收费,不过也可以免费试用。想不到它有linux版本。
sudo snap install xmind
以下可能记录比较乱,因为一开始只是为了方便以后再次使用时做的笔记。
ubuntu清除卸载后的残留信息
#查看已经安装到系统的软件列表apt list#如果有卸载后的残留信息会有提示的,通过下面命令清除[rc|ic]dpkg -l |grep ^rc|awk '{print $2}' |sudo xargs dpkg -P
修改ubuntu grub启动等待时间
如果不这样修改每次启动系统时在启动菜单里都会有30秒的等待时间 ,为了提高速度,这里把等待时间改成3秒。
-
修改配置文件
sudo vim /etc/default/grub # 默认启动的系统序号,显示在开机界面的,从0开始,这里一般不做修改保留 GRUB_DEFAULT=0 # grub页面选择等待的超时时间 GRUB_RECORDFAIL_TIMEOUT=3 GRUB_HIDDEN_TIMEOUT_QUIET=true GRUB_DISTRIBUTOR=`lsb_release -i -s 2> /dev/null || echo Debian` GRUB_CMDLINE_LINUX_DEFAULT="quiet splash" GRUB_CMDLINE_LINUX="" -
可以能过查找文件方式发现两个文件其实是指向同一个文件的
swper@15IKBN:~$ which update-grub|xargs file /usr/sbin/update-grub: POSIX shell script, ASCII text executable swper@15IKBN:~$ which update-grub2|xargs file /usr/sbin/update-grub2: symbolic link to update-grub #update-grub2也是指向了update-grub -
上面修改完并不能生效
根据配置文件/etc/default/grub中记录的文件:/boot/grub/grub.cfg再次找到/etc/grub.d/00_header文件,在此文件中发现其实是参数:GRUB_RECORDFAIL_TIMEOUT 影响的。所以加上参数GRUB_RECORDFAIL_TIMEOUT = 5
- 修改完配置文件记得更新
sudo update-grub

#重启机器即可
ubuntu关机时间等待过长的问题
sudo apt-get install watchdog
sudo systemctl enable watchdog.service
sudo systemctl start watchdog.service
安装xmind
这是一款思维导图工具,用过都知道好。
sudo snap install xmind
安装postman工具
调试一些API非常实用的工具。
sudo snap install postman
ubuntu清除卸载后的残留信息
#查看已经安装到系统的软件列表
apt list
#如果有卸载后的残留信息会有提示的,通过下面命令清除[rc|ic]
dpkg -l |grep ^rc|awk '{print $2}' |sudo xargs dpkg -P
挂载nfts硬盘
因为是从windows切换过来的,以前保留在机械硬盘里的数据还要继续使用的,所以通过把它挂载上来使用。
#创建一个目录用于机械硬盘的分区,多个分区就创建多个目录来挂载,类似下方的操作即可。
mkdir /disk2

#添加记录到/etc/fstab文件
/dev/sda2       /disk2  ntfs    defaults        0       0

#验证是否成功
sudo mount -a
开启双屏输出
这个主要是我使用笔记本的hdmi接口接到电视上时遇到的一个问题,可能并不一定要这样设置。在不能正常的情况下再考虑这样操作。
添加一个外接显示器时需要做以下几步
-
检查系统中的多屏输出接口
xrandr二.设置双屏幕显示:
-
打开外接显示器,双屏幕显示相同的内容--克隆(auto为最高分辨率)
xrandr --output HDMI-1-2 --same-as DP-1-1 --auto -
若要指定外接显示器的分辨率可以使用下面的命令(1280*1024)
xrandr --output HDMI-1-2 --same-as DP-1-1 --mode 1920x1080 -
打开外接显示器,设置为右侧扩展
xrandr --output HDMI-1-2 --rivht-of DP-1-1 --auto -
关闭显示器
xrandr --output HDMI-1-2 --off -
打开VGA-0接口显示器,关闭
HDMI-1-2接口显示器xrandr --output DP-1-1 --auto --output DMI-1-2 --off -
如果输出的屏幕没有带声音的话,需要在声音那边选择输出
安装微信
在安装完ubuntu后的好几天,非常不爽啊,微信都不能用,后来发现了可以通过docker方式来运行一个微信,而且功能都不错。以下就是记录一下安装操作记录。
-
安装docker
#移除旧的软件包 sudo apt-get remove docker docker-engine docker.io containerd runc #更新一下系统的源 sudo apt-get update sudo apt-get install \ apt-transport-https \ ca-certificates \ curl \ gnupg \ lsb-release #添加官方源 curl -fsSL https://download.docker.com/linux/ubuntu/gpg | sudo gpg --dearmor -o /usr/share/keyrings/docker-archive-keyring.gpg #因为我的是64位系统 echo \ "deb [arch=amd64 signed-by=/usr/share/keyrings/docker-archive-keyring.gpg] https://download.docker.com/linux/ubuntu \ $(lsb_release -cs) stable" | sudo tee /etc/apt/sources.list.d/docker.list > /dev/null #安装docker sudo apt-get update sudo apt-get install docker-ce docker-ce-cli containerd.io #为了方便添加开机启动 sudo systemctl docker enable --now -
拉取镜像
sudo docker pull bestwu/wechat -
创建一个启动脚本
weixin.shcat >$HOME/weixin.sh<<-EOF #!/usr/bin/bash sudo docker rm -f wechat >/dev/null 2>&1 sudo docker run -d --name wechat --device /dev/snd --ipc=host \ -v /tmp/.X11-unix:/tmp/.X11-unix \ -v $HOME/WeChatFiles:/WeChatFiles \ -e DISPLAY=unix$DISPLAY \ -e XMODIFIERS=@im=fcitx \ -e QT_IM_MODULE=fcitx \ -e GTK_IM_MODULE=fcitx \ -e AUDIO_GID=`getent group audio | cut -d: -f3` \ -e GID=`id -g` \ -e UID=`id -u` \ bestwu/wechat EOF -
启动容器
sh weixin.sh -
查看系统中audio ID 值
getent group audio | cut -d: -f3解决问题
-
中文输入,把脚本中
ibus改成fcitx -
微信中的音频问题,
AUDIO_GID用于获取主机的声卡ID
-
中文输入,把脚本中
因为直接执行上面脚本时,会每次都把上一次的容器删除,导致聊天记录也删除了,不方便,再者就是启动慢很多.所以在第一次启动后,我们直接以start方式启动停止的容器,更方便还能看到历史聊天记录.
创建另一个启动脚本wechat.sh
#!/usr/bin/bash
sudo docker start wechat
创建一个桌面图标Wechat.desktop
同样由于docker启动的微信没有图标,所以自己添加一个图标了方便打开。
[Desktop Entry]
Type=Application
Name=Wechat
Icon=/disk2/linuxSoft/wechat.png
GenericName=Wechat
Comment=Wechat
Exec="/disk2/linuxSoft/wechat.sh" -desktop
Terminal=false
Categories=Wechat;tencent;
为了方便我们会把快捷方式加到/usr/share/applications目录,这样就可以在应用程序列表中看到刚才创建的程序了.
安装Preload
Preload(预加载)会在后台工作,以「研究」您如何使用计算机并增强计算机的应用程序处理能力。安装好 Preload 后,您使用频率最高的应用程序的加载速度就会明显快于不经常使用的应用程序。具体这个没发现什么效果,所以自己看着办咯。
sudo apt install preload
正常要打开魔兽世界冰封王座的话可能要通过命令来启动,但是这样不方便,所以要创建一个图标来点击运行程序。
魔兽世界冰封王座桌面图标
由于魔兽世界是windows 应用程序,所以通过win方式来启动.创建一个
Warcraft.desktop文件,内容如下:
[Desktop Entry]
Type=Application
Name=Warcraft III
Icon=/disk2/Warcraft/war3.ico
GenericName=Warcraft III
Comment=Warcraft
Exec=wine "/disk2/Warcraft/war3.exe" -opengl -desktop        #这里注意游戏的目录,我是在nfts分区上的,而它是挂载到disk2目录下
Terminal=false
Categories=Warcraft;GAME;
安装Vscode
如果是通过snap软件仓库安装的话会遇到无法输入中文,所以直接使用官方的安装包
参考:https://code.visualstudio.com/docs/setup/linux
sudo dpkg -i code_1.57.1-1623937013_amd64.deb
dpkg 安装和卸载软件
安装软件包
ubuntu下软件包的后缀后为
.deb,手动安装可以通过dpkg命令来安装
dpkg -i 软件包名
卸载软件包
通过dpkg方式安装的话,可能有些软件安装后的程序名跟安装包的名称不一样,所以我们先通过搜索出来再卸载.当卸载完后会发现有些图标啊,或者程序还在运行中等.此时需要先程序退出,等待程序清理完.
dpkg -l|grep "软件包名"
dpkg -r name               #卸载包,卸载软件,保留配置文件
dpkg -P name               #清除包配置文件之类的,卸载软件,同时删除配置文件
dpkg -s name           #查看软件包信息
dpkg -L name           #查看软件包的安装路径`
Ubuntu忘记登陆密码的方法
1、关机,按住Esc 或者Shift键,重新开机,进入GNU GRUB启动菜单栏
2、选择Advanced option for Ubuntu,点击回车
3、选择带有(recovery mode),不要点击回车,按下E键,进入下一个界面
4、往下走几行找到以linux开头的行,找到ro recovery nomodeset删除,并在最后添加rw quiet splash rw init=/bin/bash 或者添加rw single init=/bin/bash
5、然后根据下方的提示按Ctrl+x进入系统重置密码
6、修改用户密码passwwd 用户名
7、关机,重新开机即可
查看并安装推荐的显卡驱动
#此命令系统会根据硬件推荐适合的显卡驱动
sudo ubuntu-drivers devices

#根据提示recommended安装
sudo apt-get install nvidia-352

#或者在Software && Updates 工具里找到附加驱动里安装
nv设置显卡
nvidia-settings
切换显卡
sudo prime-select nvidia #使用用nv独显
sudo prime-select intel   #使用集成
查看当前显卡的驱动
nvidia-smi
ubuntu关于sudoer编辑不正确但又已经保存了文件现在的异常
swper@virtual:~$ sudo vim /etc/sudoers
/etc/sudoers: 语法错误 near line 27 <<< sudo: /etc/sudoers 中第 27 行附近有解析错误 sudo: 没有找到有效的 sudoers 资源,退出 sudo: 无法初始化策略插件
解决方法:
pkexec visudo     #会提示输入密码,然后进入编辑器,只需要把错误那行删除并保存即可。
防火墙ufw简单操作
#默认都应该安装了ufw
apt-get install ufw

#启动
systemctl start ufw

# 关闭

systemct stop ufw

#查看状态
systemctl status ufw  或者  ufw status


#启动规则
ufw enable

#禁用规则
ufw disable


#重置规则
ufw reset


#放行规则

#服务名
ufw allow ssh
ufw allow https
ufw allow http

#端口
ufw allow 22
ufw allow 443
ufw allow 80

ufw allow 6000:6003/tcp

#禁止
ufw deny from 192.168.11.7

#查看规则列表
ufw status numbered

#删除规则,通过上面的列表看到序号
ufw delete 4

#通过服务名删除
ufw delete allow http
确认笔记本显示的型号
swper@15IKBN:~$ sudo lshw -numeric -C display|grep -A6 product
       product: GP107M [GeForce GTX 1050 Mobile] [10DE:1C8D]
       vendor: NVIDIA Corporation [10DE]
       physical id: 0
       bus info: pci@0000:01:00.0
       version: a1
       width: 64 bits
       clock: 33MHz
--
       product: HD Graphics 630 [8086:591B]
       vendor: Intel Corporation [8086]
       physical id: 2
       bus info: pci@0000:00:02.0
       version: 04
       width: 64 bits
       clock: 33MHz
关于笔记本显示的安装
swper@15IKBN:~$ ubuntu-drivers devices
WARNING:root:_pkg_get_support nvidia-driver-390: package has invalid Support Legacyheader, cannot determine support level
== /sys/devices/pci0000:00/0000:00:01.0/0000:01:00.0 ==
modalias : pci:v000010DEd00001C8Dsv000017AAsd000039D1bc03sc02i00
vendor   : NVIDIA Corporation
model    : GP107M [GeForce GTX 1050 Mobile]
driver   : nvidia-driver-390 - distro non-free
driver   : nvidia-driver-470 - distro non-free recommended           #推荐安装的版本,我这里也是安装了这个版本
driver   : nvidia-driver-460-server - distro non-free
driver   : nvidia-driver-450-server - distro non-free
driver   : nvidia-driver-460 - distro non-free
driver   : nvidia-driver-418-server - distro non-free
driver   : xserver-xorg-video-nouveau - distro free builtin


#可以执行以下命令安装
sudo ubuntu-drivers autoinstall

#如果没有特别的话也可以直接使用图形工具安装
未知的问题
运行dmesg 查看内核启动日志时发现的
[    0.243844] platform MSFT0101:00: failed to claim resource 1: [mem 0xfed40000-0xfed40fff]
[    0.243848] acpi MSFT0101:00: platform device creation failed: -16


# 以下感觉是启动时间长的原因,在蓝牙模块初始化时耗时太久了
[   11.984497] Started bpfilter
[   12.033605] Initializing XFRM netlink socket
[   12.228638] rfkill: input handler disabled
[  894.842882] Bluetooth: RFCOMM TTY layer initialized
[  894.842890] Bluetooth: RFCOMM socket layer initialized
[  894.842894] Bluetooth: RFCOMM ver 1.11
[  894.995672] rfkill: input handler enabled
[  900.518178] rfkill: input handler disabled
[  900.798111] audit: type=1400 audit(1626959530.057:43): apparmor="DENIED" operation="capable" profile="/snap/snapd/12398/usr/lib/snapd/snap-confine" pid=60704 comm="snap-confine" capability=4  capname="fsetid"


#查看蓝牙服务状态时有这样的提示
swper@15IKBN:~$ sudo systemctl status bluetooth.service
● bluetooth.service - Bluetooth service
     Loaded: loaded (/lib/systemd/system/bluetooth.service; enabled; vendor preset: enabled)
     Active: active (running) since Thu 2021-07-22 20:57:14 CST; 1h 16min ago
       Docs: man:bluetoothd(8)
   Main PID: 764 (bluetoothd)
     Status: "Running"
      Tasks: 1 (limit: 9327)
     Memory: 2.1M
     CGroup: /system.slice/bluetooth.service
             └─764 /usr/lib/bluetooth/bluetoothd

7月 22 20:57:14 15IKBN systemd[1]: Starting Bluetooth service...
7月 22 20:57:14 15IKBN bluetoothd[764]: Bluetooth daemon 5.53
7月 22 20:57:14 15IKBN systemd[1]: Started Bluetooth service.
7月 22 20:57:14 15IKBN bluetoothd[764]: Starting SDP server
7月 22 20:57:14 15IKBN bluetoothd[764]: Bluetooth management interface 1.17 initialized
7月 22 20:57:14 15IKBN bluetoothd[764]: Failed to set mode: Blocked through rfkill (0x12)
7月 22 20:57:21 15IKBN bluetoothd[764]: Failed to set mode: Blocked through rfkill (0x12)
7月 22 21:12:04 15IKBN bluetoothd[764]: Endpoint registered: sender=:1.73 path=/MediaEndpoint/A2DPSink/sbc
7月 22 21:12:04 15IKBN bluetoothd[764]: Endpoint registered: sender=:1.73 path=/MediaEndpoint/A2DPSource/sbc


#查看设备的状态
swper@15IKBN:~$ rfkill
ID TYPE      DEVICE                 SOFT      HARD
 0 wlan      ideapad_wlan      unblocked unblocked
 1 bluetooth ideapad_bluetooth   blocked unblocked
 2 bluetooth hci0                blocked unblocked
 3 wlan      phy0              unblocked unblocked


#禁止
swper@15IKBN:~$ rfkill block bluetooth
#执行完操作后,重启机器再看dmesg日志发现在初始化蓝牙时的耗时很短了
[   12.475783] Initializing XFRM netlink socket
[   12.775701] rfkill: input handler disabled
[   23.657272] Bluetooth: RFCOMM TTY layer initialized
[   23.657276] Bluetooth: RFCOMM socket layer initialized
[   23.657279] Bluetooth: RFCOMM ver 1.11
[   23.807611] rfkill: input handler enabled
[   29.147037] rfkill: input handler disabled


#解除
swper@15IKBN:~$ rfkill unblock bluetooth
最后还是要说明一下,ubuntu在使用过程中还是会有多次提示提交bug或者异常的提示框,至少比蓝屏的好多了。可选择不发送,继续使用,本文暂时就记录到此,以后有新问题或者记录会继续关注。