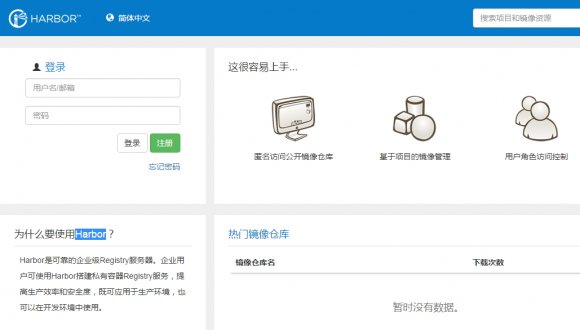
在企业内部使用Docker容器来部署使用是我们都会自己搭建一个自己的私有Docker Registry 仓库;网上有很多种方法,这里介绍使用 Vmwar 公司开源的 企业级的 Docker Registry 来管理项目;主要它还带中文。
环境要求:
[root@reg harbor]# cat /etc/redhat-release
CentOS Linux release 7.2.1511 (Core)
Python 2.7.5 #系统自带
Docker version 1.10.3
docker-compose version 1.10.1
安装软件:
curl -fsSL https://get.docker.io | bash
yum install python-pip -y
pip install -i https://pypi.douban.com/simple/  docker-compose
修改docker配置文件:
修改docker的默认仓库:
vim /etc/sysconfig/docker
OPTIONS='--selinux-enabled -H 0.0.0.0:2375 -H unix:///var/run/docker.sock --insecure-registry 10.0.10.88'
重启docker服务:systemctl restart docker.service
harbor离线安装包下载:[303M大小]
https://github.com/vmware/harbor/releases/download/0.5.0/harbor-offline-installer-0.5.0.tgz
[root@reg ~]# tar xf harbor-offline-installer-0.5.0.tgz -C /opt/
[root@reg ~]# cd /opt/harbor/
[root@reg harbor]# ls
common  docker-compose.yml  harbor.0.5.0.tgz  harbor.cfg  install.sh  LICENSE  NOTICE  prepare
1、修改配置文件harbor.cfg
hostname= reg.docker.tb       #本机外网IP或域名,该地址供用户通过UI进行访问,不要使用127.0.0.1
ui_url_protocal = https     #配置访问协议,默认为http;如果要启动SSl认证为:https
email_server = smtp.qq.com #配置邮件服务器地址
email_server_port =25      #邮件服务器端口
email_username= xxxxx      #用户
email_password = xxxx      #密码
email_from = admin@simpletour.com   #发件人地址
email_ssl = false          #是否进行ssl加密
harbor_admin_password = Harbor12345     #harbor admin的初始密码
auth_mode = db_auth   #harbor认证模式,默认为db_auth,本地mysql,也可以配置ldap认证
#ldap认证方式
ldap_url= ldaps://ldap.mydomain.com
ldap_basedn = ou=people,dc=mydomain,dc=com
ldap_uid = uid
ldap_scope = 3

#数据库密码
db_password = root123
self_registration = on
use_compressed_js = on
max_job_workers = 3         #最大工作进程
token_expiration = 30       #token过期时间,默认为30分钟
verify_remote_cert = on
customize_crt = on

#显示的认证及组织信息
crt_country = CN
crt_state = State
crt_location = CN
crt_organization = organization
crt_organizationalunit = organizational unit
crt_commonname = example.com
crt_email = example@example.com

#可选的https证书配置地址
ssl_cert = /root/cert/reg.docker.tb.crt
ssl_cert_key = /root/cert/reg.docker.tb.key
2、上面启动了SSL认证,所以要创建一个CA证书[实验环境自己创建,线上环境购买就好]
创建相应目录:
mkdir -p /root/cert/
进入/data/cert目录下,创建CA认证:
localdomain=reg.docker.tb
以下根据自己情况修改:
openssl req -nodes -subj "/C=CN/ST=GuangDong/L=DongGuan/CN=$localdomain" -newkey rsa:2048 -keyout $localdomain.key -out $localdomain.csr
openssl x509 -req -days 3650 -in $localdomain.csr -signkey $localdomain.key -out $localdomain.crt

openssl x509 -req -in $localdomain.csr -CA $localdomain.crt -CAkey $localdomain.key -CAcreateserial -out $localdomain.crt -days 10000
执行安装./install.sh
[root@reg harbor]# ./install.sh
[Step 0]: checking installation environment ...
Note: docker version: 1.10.3
Note: docker-compose version: 1.10.1
[Step 1]: loading Harbor images ...
[Step 2]: preparing environment ...
loaded secret key
Generated configuration file: ./common/config/nginx/nginx.conf
Generated configuration file: ./common/config/ui/env
Generated configuration file: ./common/config/ui/app.conf
Generated configuration file: ./common/config/registry/config.yml
Generated configuration file: ./common/config/db/env
Generated configuration file: ./common/config/jobservice/env
Generated configuration file: ./common/config/jobservice/app.conf
Generated configuration file: ./common/config/ui/private_key.pem
Generated configuration file: ./common/config/registry/root.crt
The configuration files are ready, please use docker-compose to start the service.
[Step 3]: checking existing instance of Harbor ...
[Step 4]: starting Harbor ...
Creating network "harbor_default" with the default driver
Creating harbor-log
Creating registry
Creating harbor-ui
Creating harbor-db
Creating harbor-jobservice
Creating nginx
----Harbor has been installed and started successfully.----
Now you should be able to visit the admin portal at http://reg.docker.tb.
For more details, please visit https://github.com/vmware/harbor .
注:默认执行上面安装后会自动启动服务;
此时打开网页访问reg.docker.tb时就会提示ssl不安全的连接,说明ssl添加成功;但是在命令行登陆docker仓库时不成功的。[用Ip登陆则成功]
[root@reg harbor]# docker login reg.docker.tb
Username (upload): admin
Password:
Email (msf6300@163.com): admin@example.com
Error response from daemon: invalid registry endpoint https://reg.docker.tb/v0/: unable to ping registry endpoint https://reg.docker.tb/v0/
v2 ping attempt failed with error: Get https://reg.docker.tb/v2/: x509: certificate is valid for server, not reg.docker.tb
 v1 ping attempt failed with error: Get https://reg.docker.tb/v1/_ping: x509: certificate is valid for server, not reg.docker.tb. If this private registry supports only HTTP or HTTPS with an unknown CA certificate, please add `--insecure-registry reg.docker.tb` to the daemon's arguments. In the case of HTTPS, if you have access to the registry's CA certificate, no need for the flag; simply place the CA certificate at /etc/docker/certs.d/reg.docker.tb/ca.crt
解决方法:停止服务:
[root@reg harbor]# docker-compose down
创建对应目录:
mkdir -p /etc/docker/certs.d/reg.docker.tb

cp /data/cert/reg.docker.tb.crt /etc/docker/certs.d/reg.docker.tb/ca.crt
启动服务:
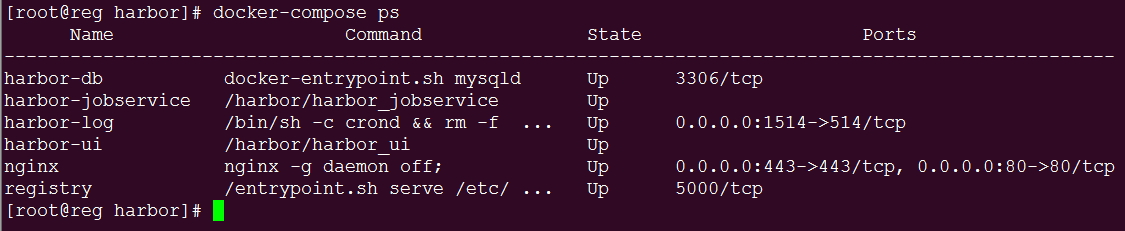
[root@reg harbor]# docker-compose up -d
再次登陆,成功了:
[root@reg harbor]# docker login reg.docker.tb
Username: admin
Password:
Email: admin@example.com
WARNING: login credentials saved in /root/.docker/config.json
Login Succeeded
查看配置文件的信息:[保存了用户名,仓库地址和加密码MD5密码]
登陆过的用户信息都会保存在: /root/.docker/config.json以json格式保存。
本机上传镜像
[root@harbor harbor]# docker push reg.docker.tb/test/ubuntu
The push refers to a repository [reg.docker.tb/test/ubuntu]
c410e650f359: Pushed
bab10a362750: Pushed
787a9151f9ae: Pushed
470641744213: Pushed
latest: digest: sha256:9274d908eb6d9a3784e93290fcc49f3c5618db9e1b0174ee27f9fc75aa3c0fb0 size: 1130
本机拉取镜像:
[root@harbor harbor]# docker pull reg.docker.tb/test/ubuntu:latest
Trying to pull repository reg.docker.tb/test/ubuntu ...
latest: Pulling from reg.docker.tb/test/ubuntu
Digest: sha256:9274d908eb6d9a3784e93290fcc49f3c5618db9e1b0174ee27f9fc75aa3c0fb0
Status: Downloaded newer image for reg.docker.tb/test/ubuntu:latest
此时,如果其它的Docker主机[centos6系统]要使用此仓库,只需要把上面的ca.crt复制到docker主机的: /etc/docker/certs.d/reg.docker.tb/目录下;并且要修改一下Docker配置文件的仓库地址:/etc/sysconfig/docker
[root@node2 certs.d]# grep "insecure-registry" /etc/sysconfig/docker
INSECURE_REGISTRY='--insecure-registry reg.docker.tb'
因为这里使用了一个域名,我同时也在/etc/hosts文件中添加了对应的解析;把docker服务重启一下即可;
注:如果你的客户端是Centos7系统,添加的参数:/usr/lib/systemd/system/docker.service
在ExecStart行后面添加仓库地址:
ExecStart=/usr/bin/docker daemon -H tcp://0.0.0.0:2375 -H unix:///var/run/docker.sock --insecure-registry reg.docker.tb